Writing Your First Automated Test
In this tutorial, we will get a simple automated test working in Unity using Regression Games. We will show you:
- How to integrate the RG Unity SDK into your game
- Record a Gameplay Session as an automated test
- Create a Validation Suite and run that against future test runs
(Optional) Download a sample game
Feel free to follow this tutorial within your own game, but we recommend starting with a sample game if you do not have a game available. Our team often uses BossRoom, a simple multiplayer game created by Unity. However, you can start with any game of your choosing!
Download the BossRoom sample from the official GitHub repository.
Note that there are some limitations of the package that may not work with your game. For instance, our framework works best with games that use standard UI canvas elements and game objects. Learn more about these limitations in our Gameplay Session recording docs.
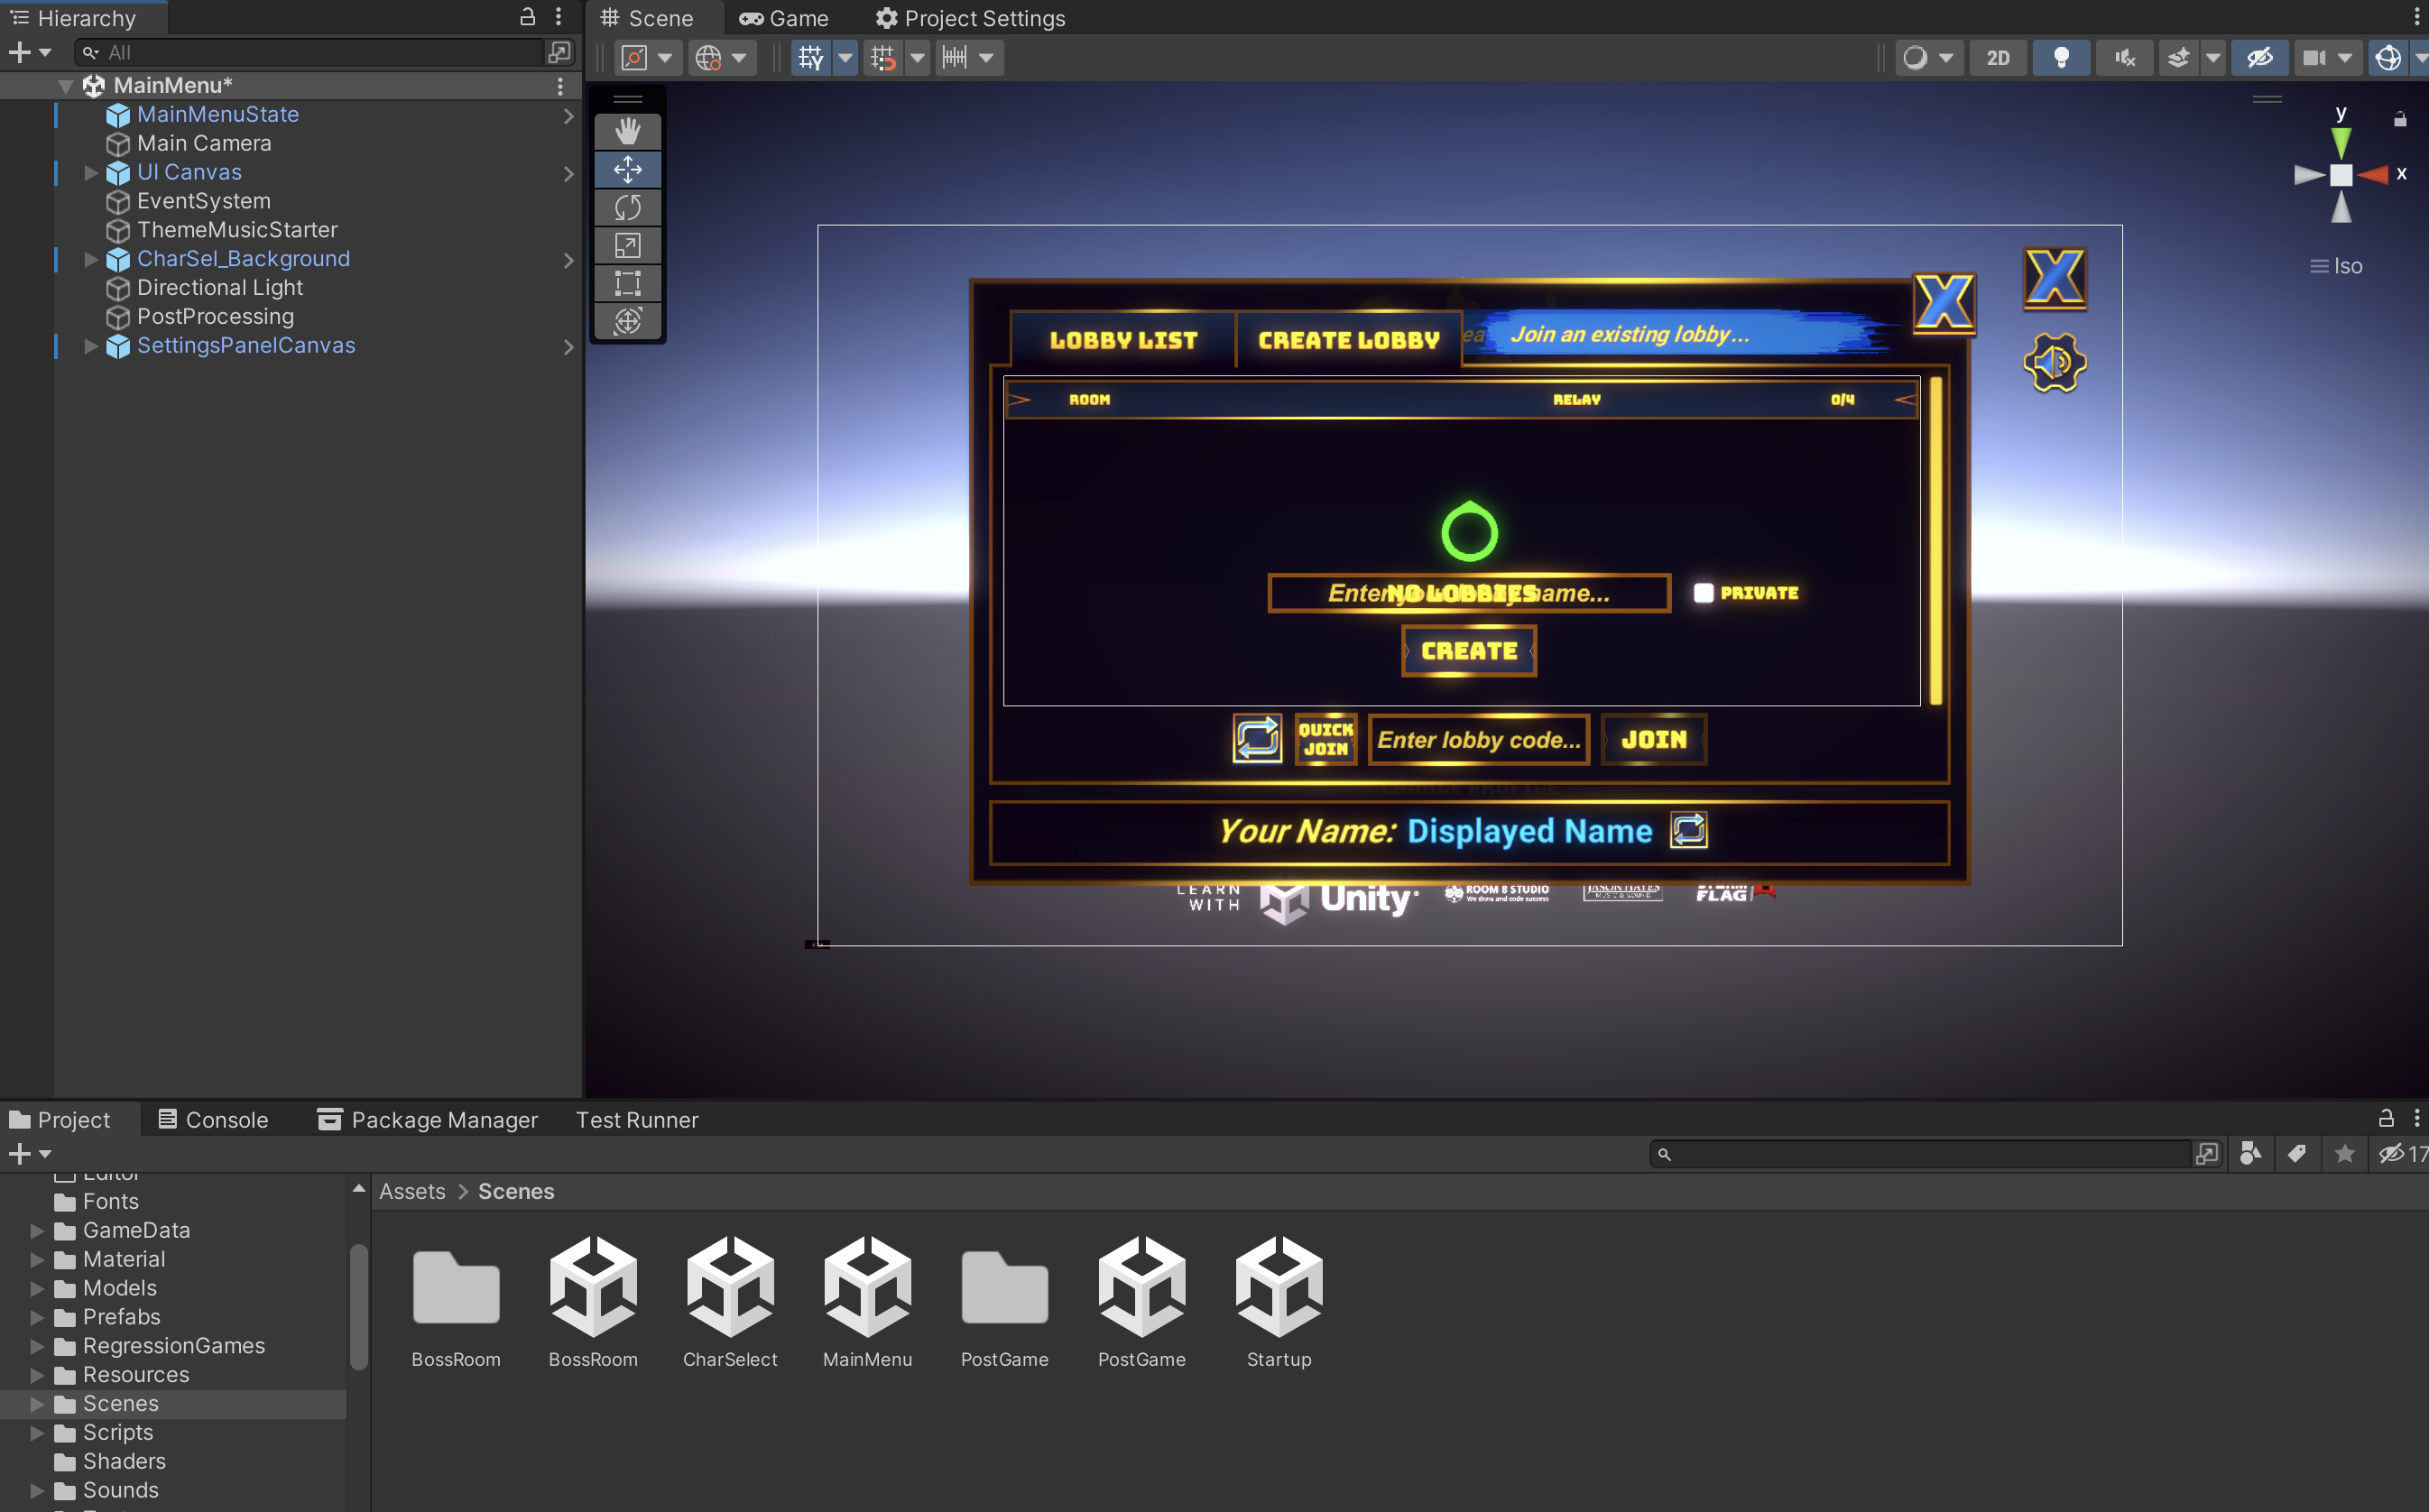
Open it within Unity version 2022.3 (visit the Unity archive if you can't find that version from Unity Hub). Once the project is loaded, open the MainMenu scene within Assets > Scenes > MainMenu.
Import the Regression Games Unity Bots package
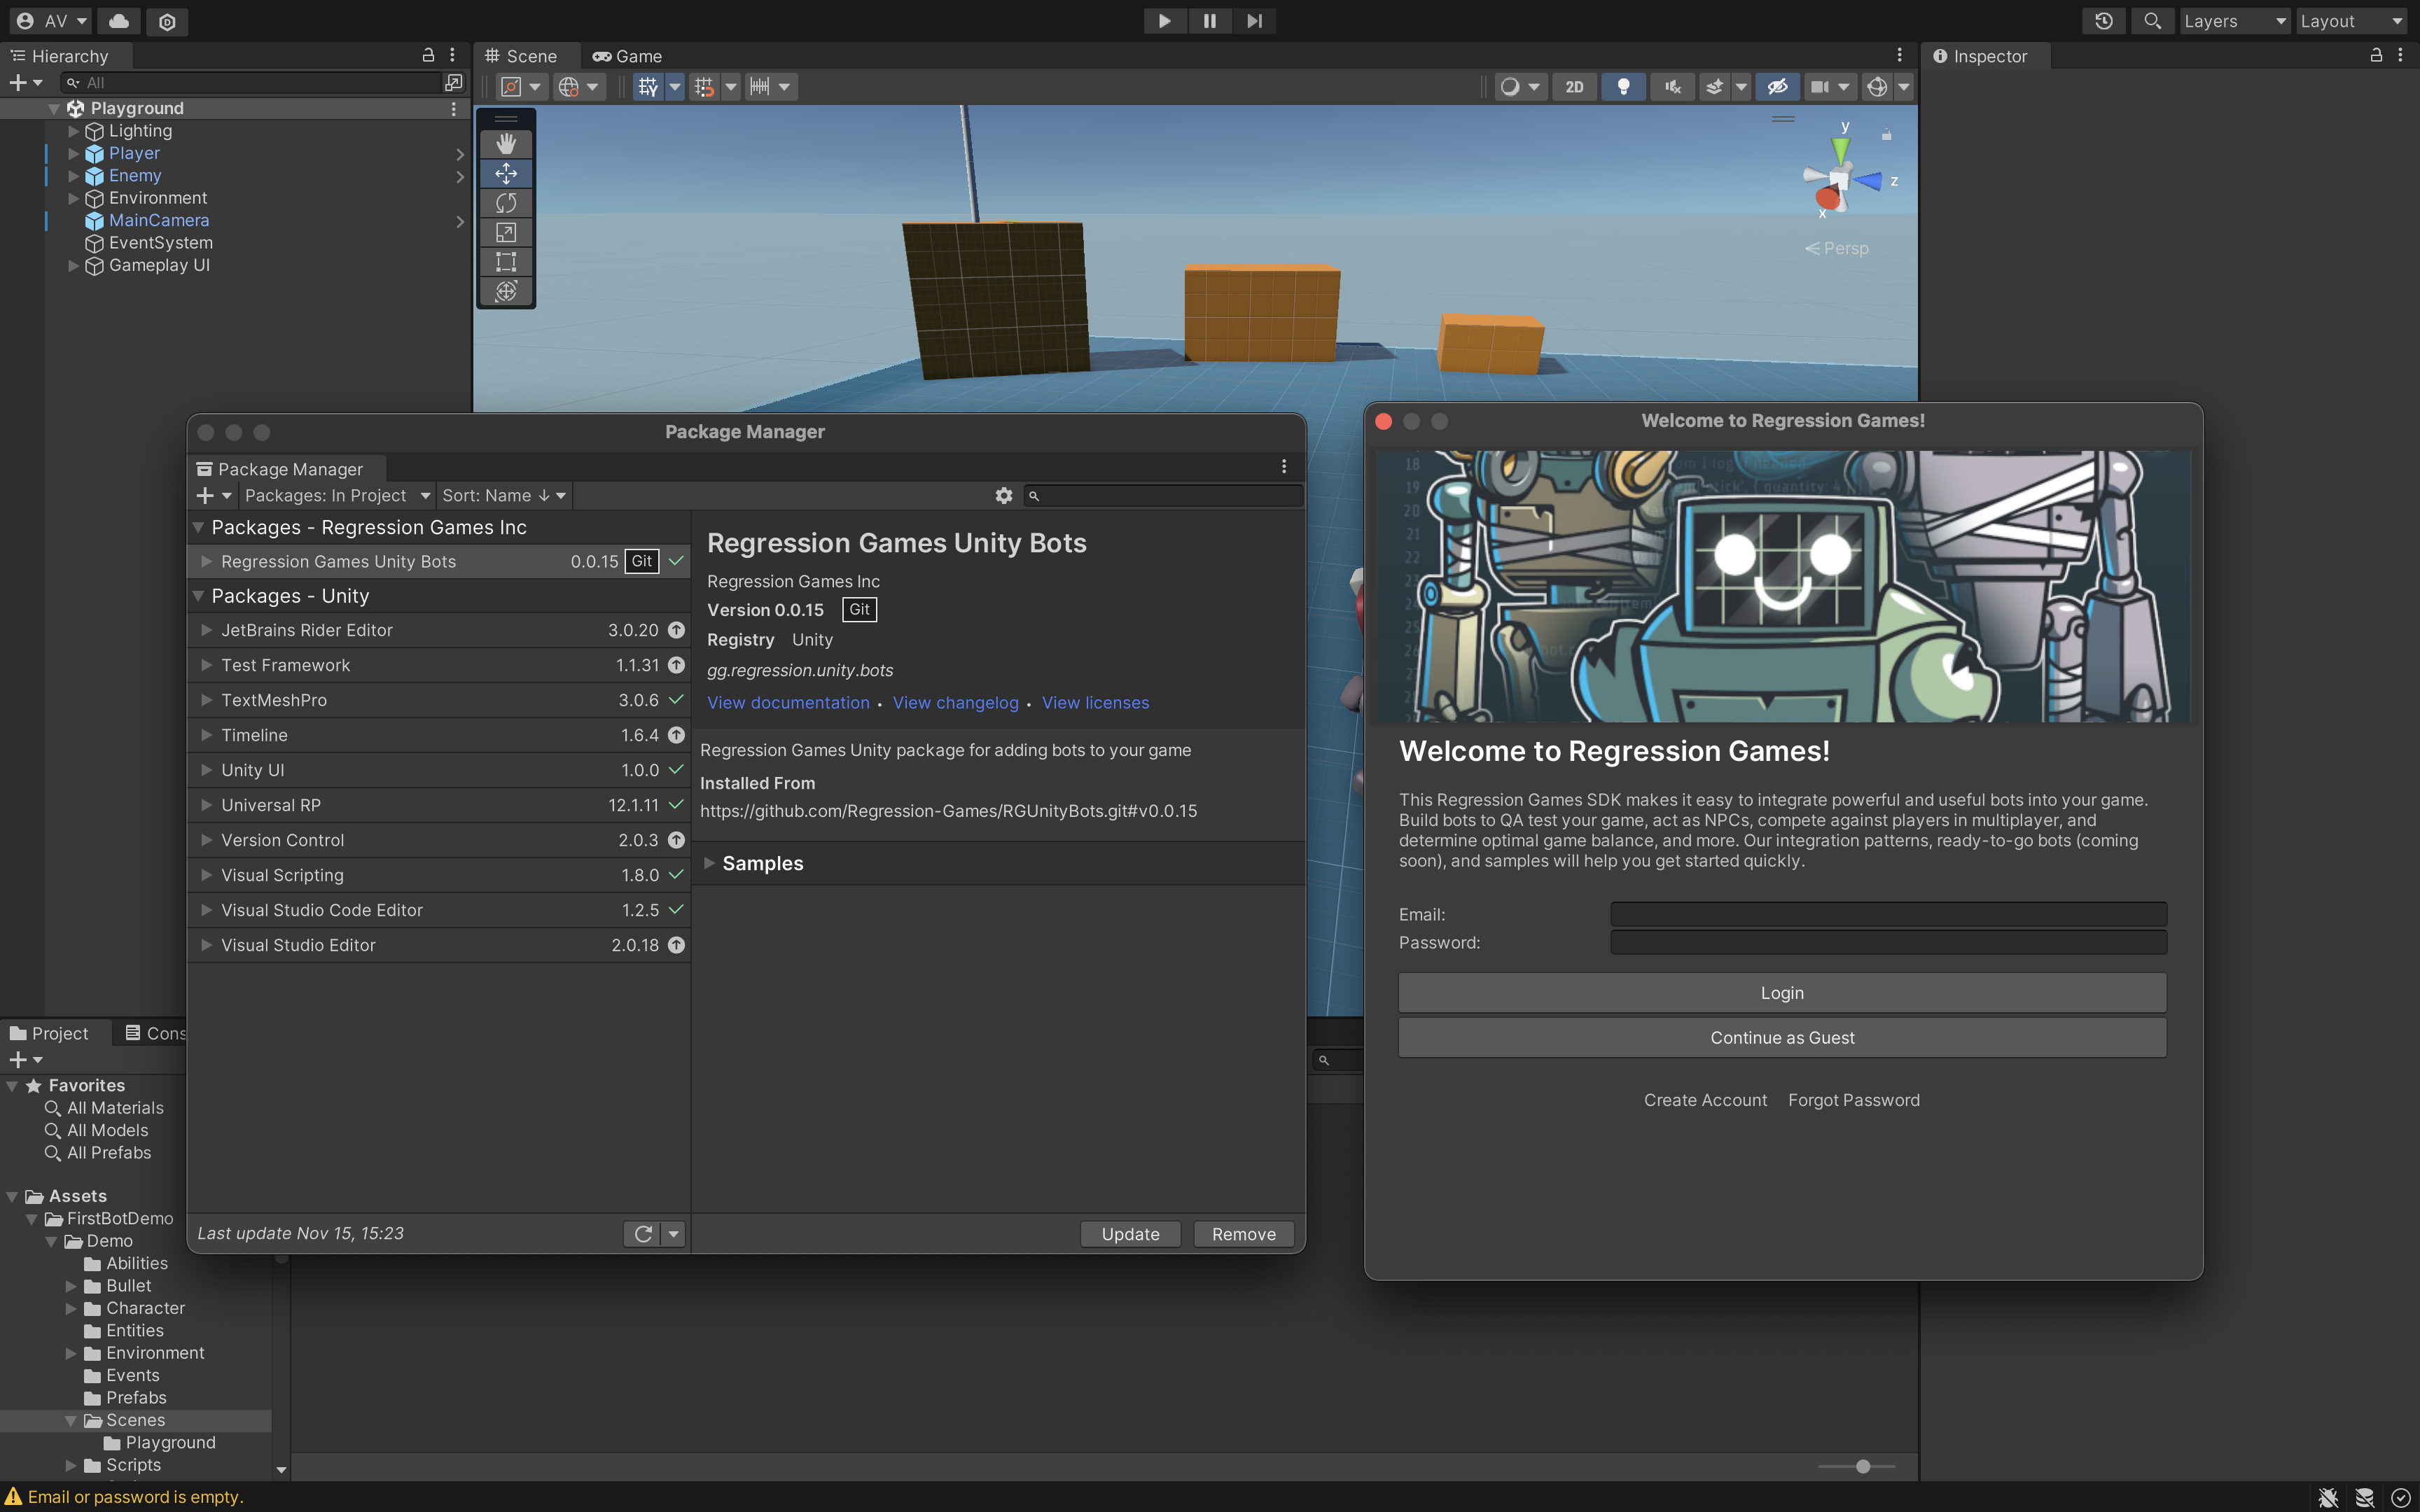
You can find our package on GitHub. Import the package into your Unity project by opening the Package Manager window (Window > Package Manager) and click Add package from git URL. Then, paste the following URL:
https://github.com/Regression-Games/RGUnityBots.git?path=src/gg.regression.unity.bots#v0.0.28
- This package utilizes TextMeshPro. If you are prompted by Unity to add TextMeshPro assets to your project, please add them.
- This package installs a dependency of Newtonsoft Json (https://docs.unity3d.com/Packages/com.unity.nuget.newtonsoft-json@3.1/manual/index.html) for serializing/deserializing Json message payloads.
- If you get a note about Unity's new input system, click Yes and allow the editor to restart.
If your game utilizes Unity's ECS, we now have an extension package available to support it.
https://github.com/Regression-Games/RGUnityBots.git?path=src/gg.regression.unity.bots.ecs#v0.0.28
Install this package in addition to / after installing the core RGUnityBots package.
After importing the package, you will be greeted by a login screen. Create an account at https://play.regression.gg and login to Unity with your account credentials. If you need to login again in the future, you can enter your login info by visiting the Regression Games > Getting Started menu.
Restart Unity and your IDE
After installing the Regression Games Unity Bots package and its dependencies into Unity, please restart Unity and your code editor (e.g. Rider or Visual Studio). Without this step, Unity and your code editor may not properly resolve the new packages even after Unity recompiles the scripts.
Record a gameplay session
The first step in automating a test is to record a gameplay session. This feature allows you to record real gameplay and play it back later as an automated test. Regression Games does offer other utilities for dynamic bots, but to get started with a simple example, we will record a click-through that verifies the functionality of the UI in BossRoom.
Add the RGOverlayCanvas
The RGOverlayCanvasV2 prefab provides an overlay that allows you to begin recording gameplay sessions.
Find the RGOverlayCanvasV2 prefab by navigating to Packages > Regression Games Unity Bots > Runtime > Prefabs and
drag it into your scene's object hierarchy. Make sure that the canvas is at the top of the hierarchy, so that it is always
visible and interactable.
Note that this overlay must be present in your scene for Regression Games to function. The visibility of the overlay can be hidden through the Regression Games settings pane under Edit > Project Settings > Regression Games. Place this component into each scene that must be able to use Regression Games SDK features.
Your scene must have an EventSystem to make interaction with the overlay possible. You can add one by right-clicking in your scene's Hierarchy and selecting GameObject > UI > Event System. If you are using the sample scene we provide, this is already included.
Record a gameplay session as an automated test
Once the overlay has been added to your scene(s), it's time to start a gameplay session recording! Our goal is to record gameplay that can later be used as an automated test. More specifically, we will test the following simple scenario (feel free to come up with your own if you are not using Boss Room):
- The game loads into the main menu
- We use the mouse to click the Volume Settings button
- We verify that the Volume Settings panel is displayed
- Finally, we close the volume settings panel
These actions are recorded and can be played back later as an automated test. As the test is run, data from the game is collected, which will then be used within validations.
As shown in the short video below, follow these steps:
- Click the play button in the editor to start the game.
- Click the red record button in the bottom right to start recording.
- Click the Volume Settings button near the top right of the main menu.
- Click the close button on the Volume Settings panel.
- Click the rec recording button in the bottom right to stop recording.
- When finished recording, click the hamburger menu next to the record button to open up a dialog for loading your
recording. You can find the recordings within the session directory.
Select the
bot_segments.zipfile and click Load Replay. - Click the play button under the Regression Games logo to see your recording play back!
Create a Validation Suite
With your first gameplay session saved, we can now write a functional test that validates the behaviour of this scenario! Visit https://play.regression.gg/validations to begin creating a new validation suite using this session.
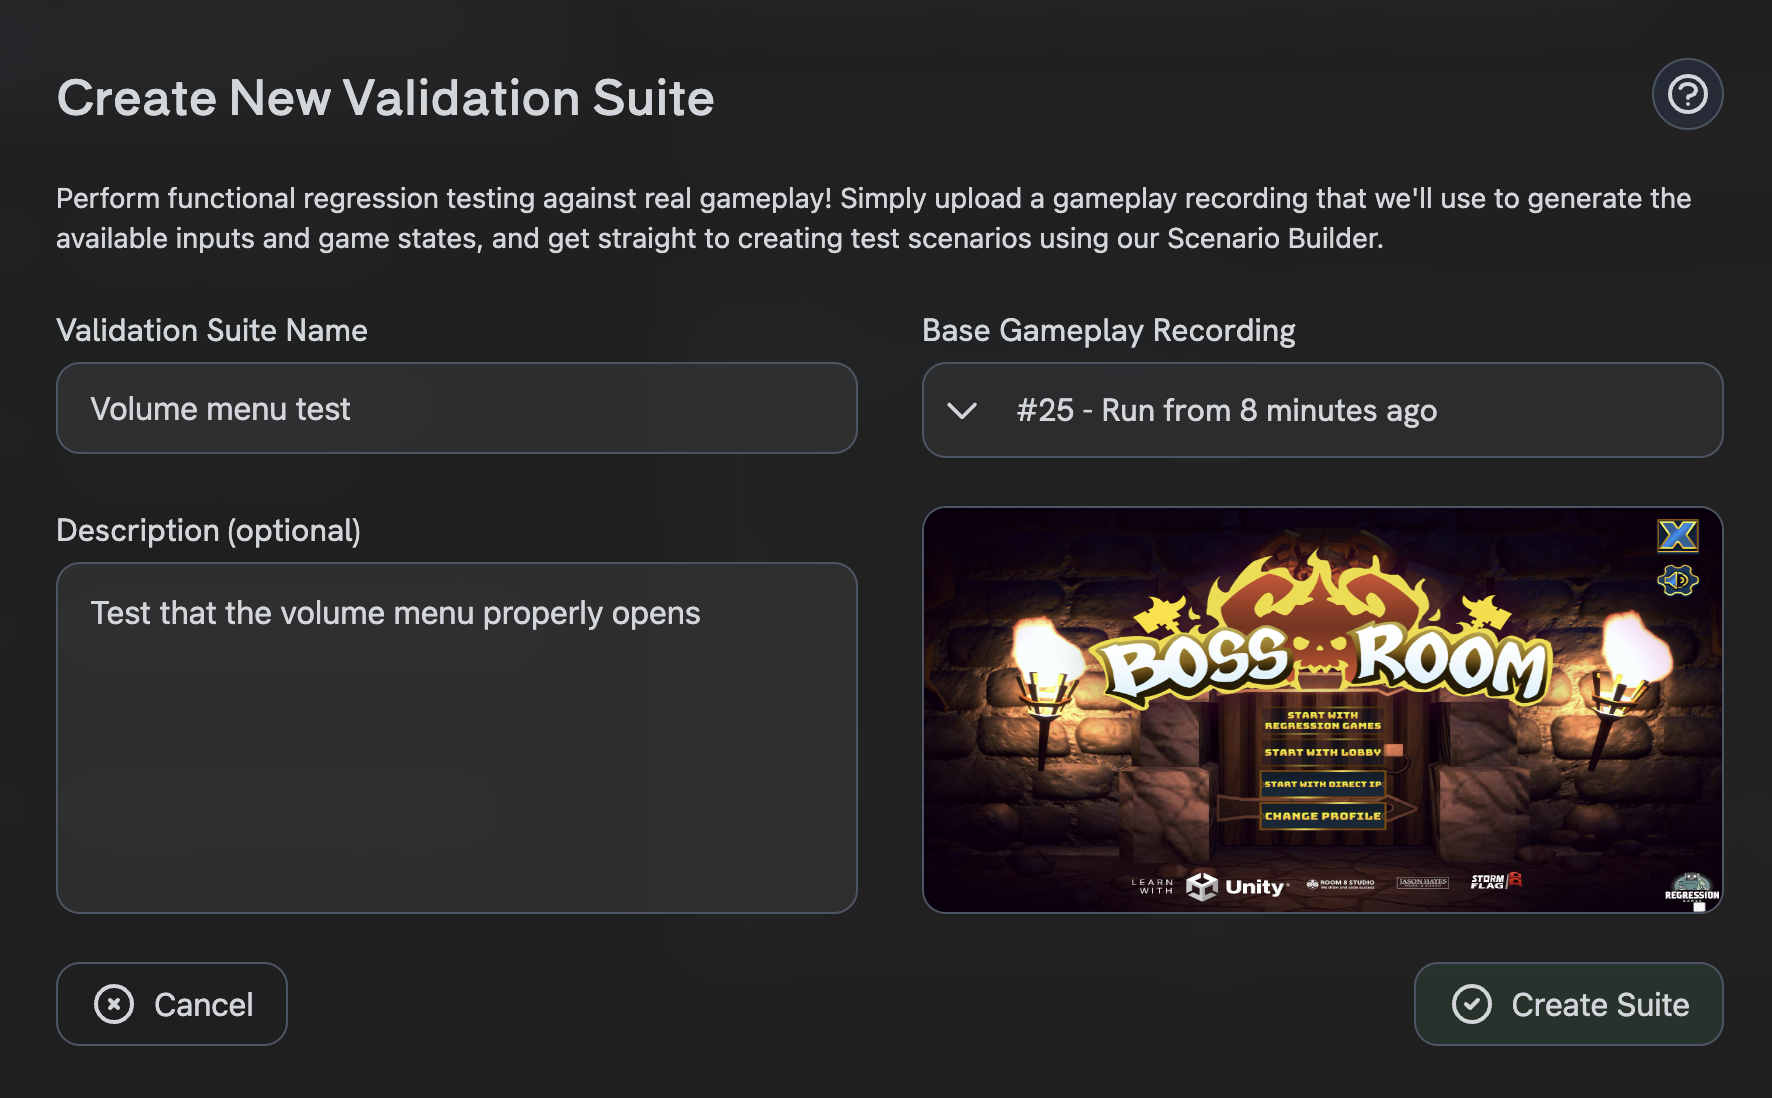
Creating the test scenario
Click Create Suite, enter a name for yor validation suite, and select the gameplay session you just recorded (if you don't see it, try refreshing the page). You may notice that there are two or more sessions; these include both the original test session and the sessions created through the automated playback, so make sure to select the one lowest in the list, which is the first one created. Click Create Suite in the bottom right.
Once the suite is created, you'll be able to select it within the Validation Suites Dashboard. Select your suite, and click Create Scenario in the bottom right to start creating your first functional test.
The editor you see here is the Scenario Editor. It features a screenshot scrubber to see your game in action, as well
as a state panel to see in-depth information scraped from your game, including not only position information, but also
Monobehaviour properties and fields, as well as keyboard and mouse inputs. For example, for a user interface, you can
see information such as image sources and text values.
Enter a name for your scenario (we used Verify that the volume mixer opens), and hover over the pane on the left to
see a list of options for validation. For this scenario, we will verify that:
- The scene loads properly
- The volume settings panel appears
This tools allows a wide variety of test scenarios, including mouse and key press detection, state assertions, and storing values for comparison (learn more in the documentation for validations). For now, we will keep it simple, and the two steps listed above. See the screenshot above and the video below to see how to add these steps (the search feature can be helpful for finding relevant elements in your scene).
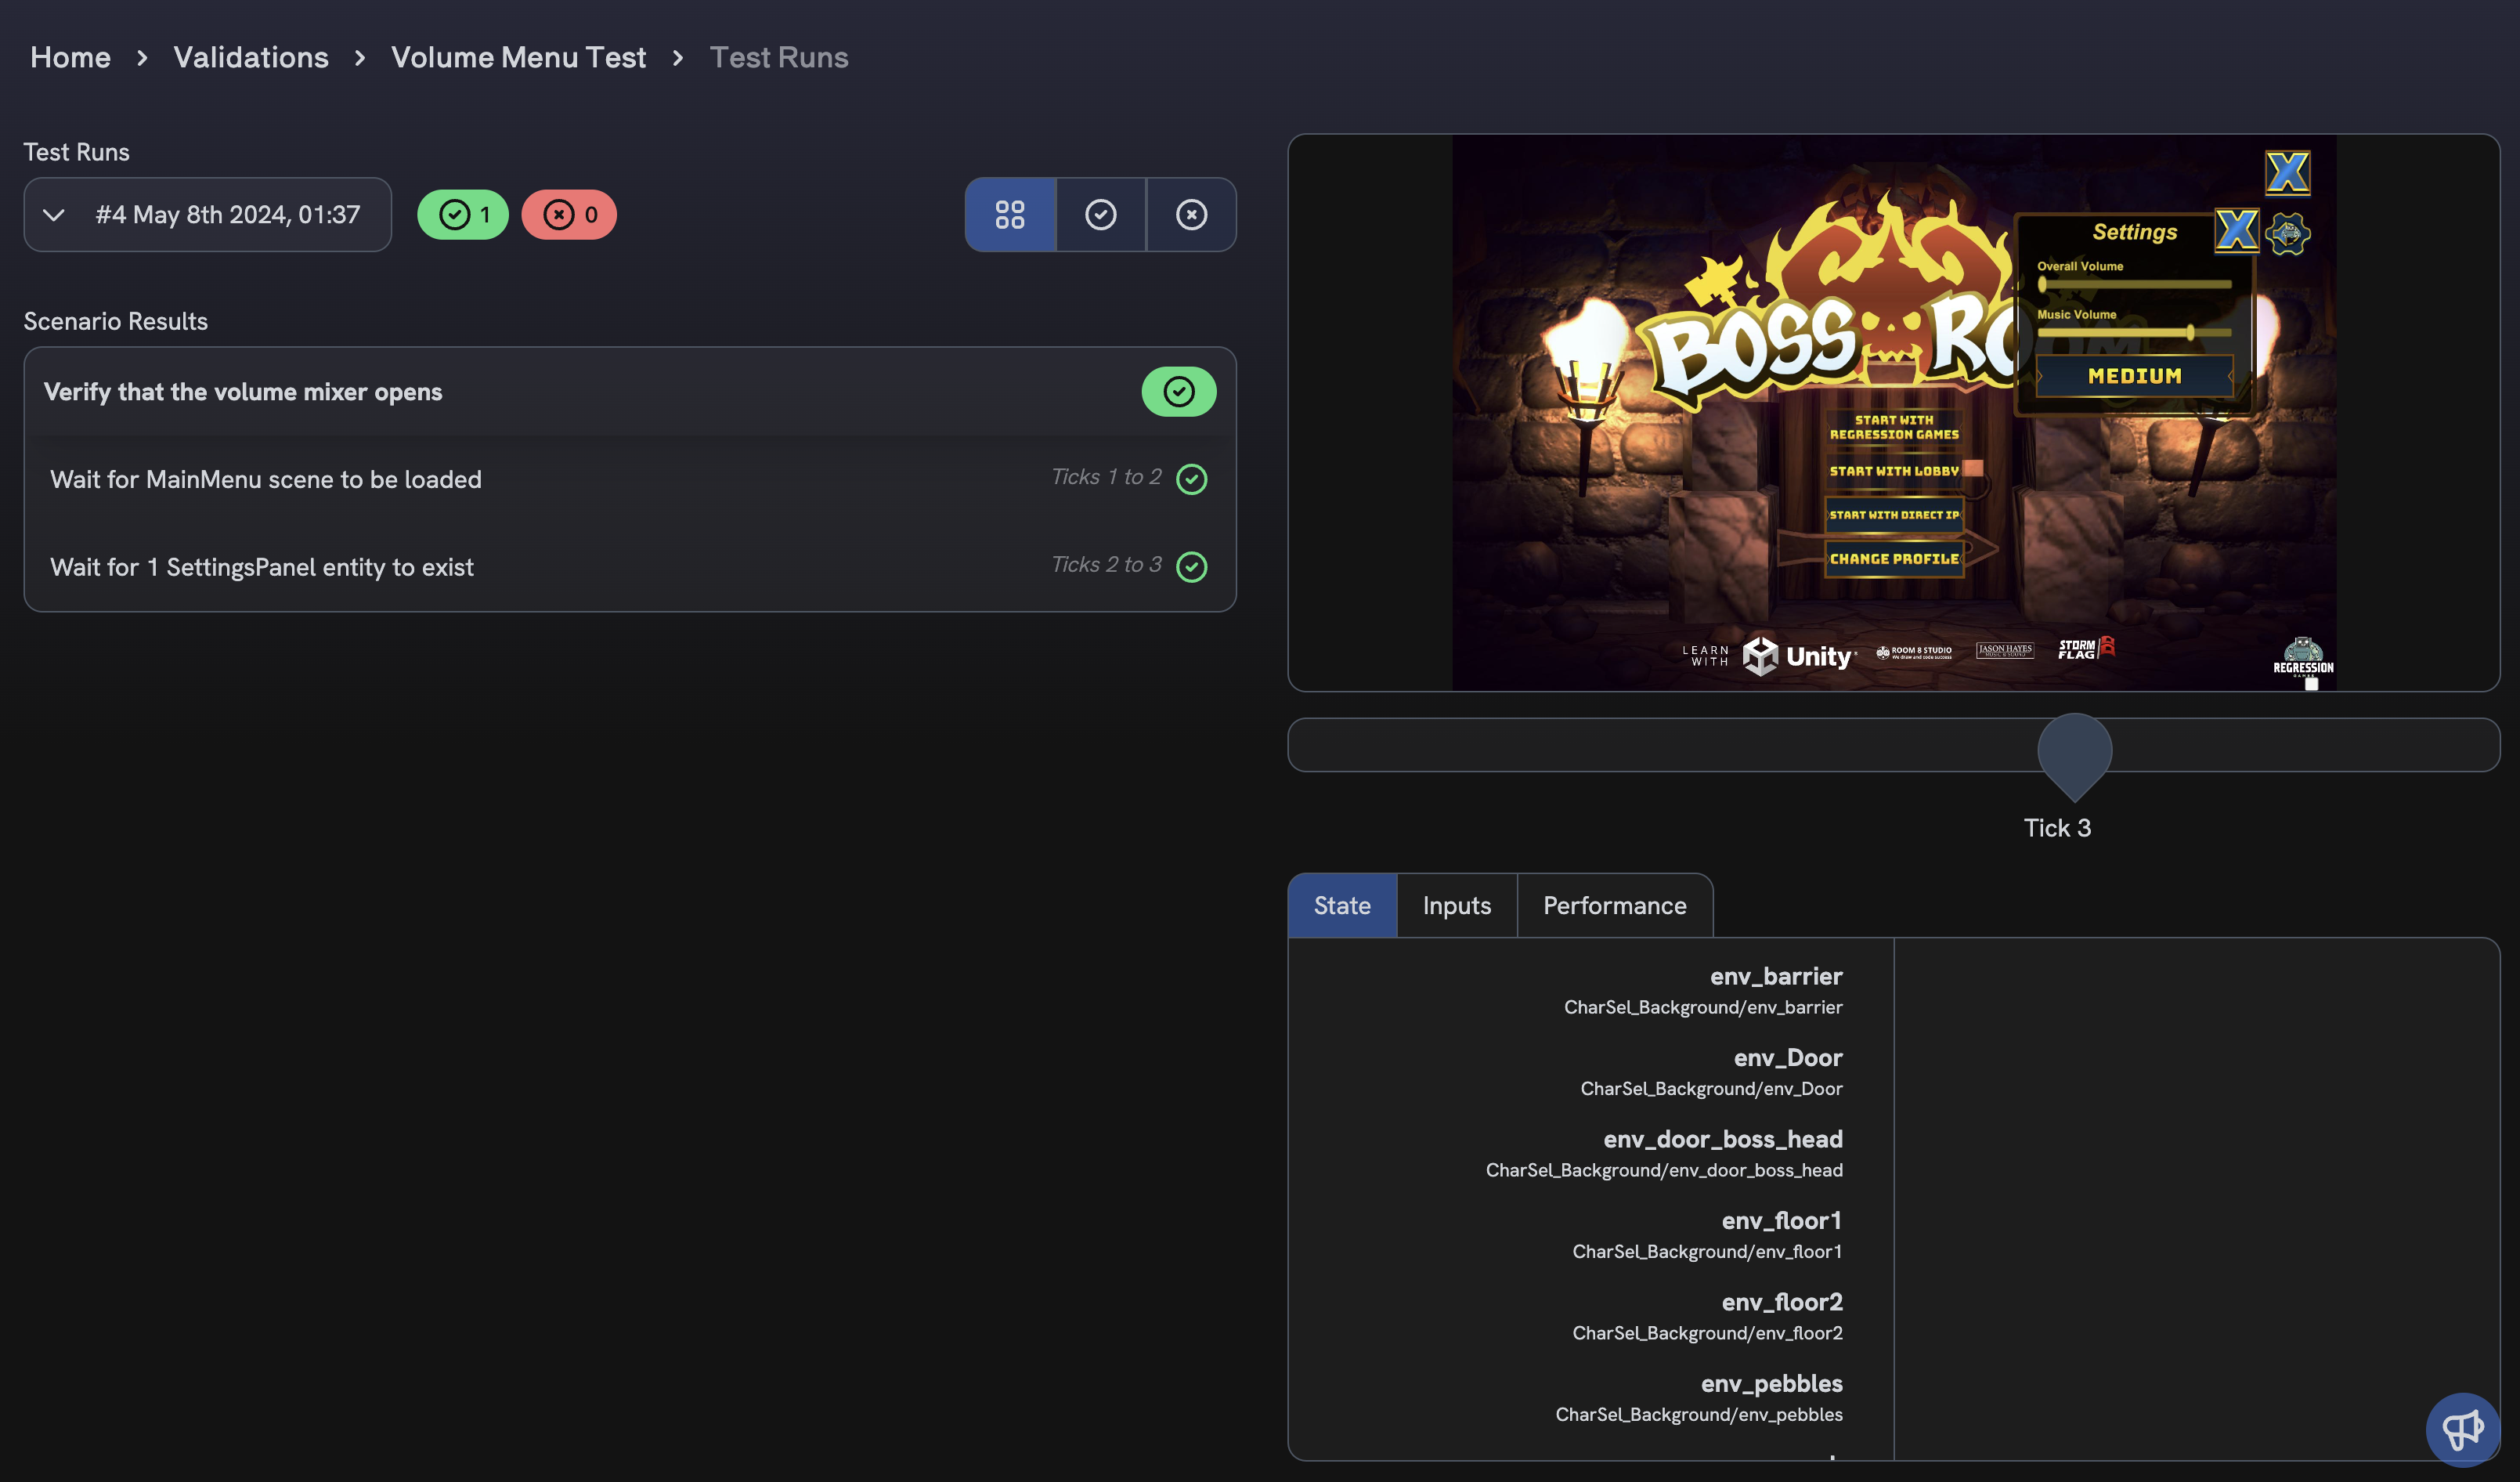
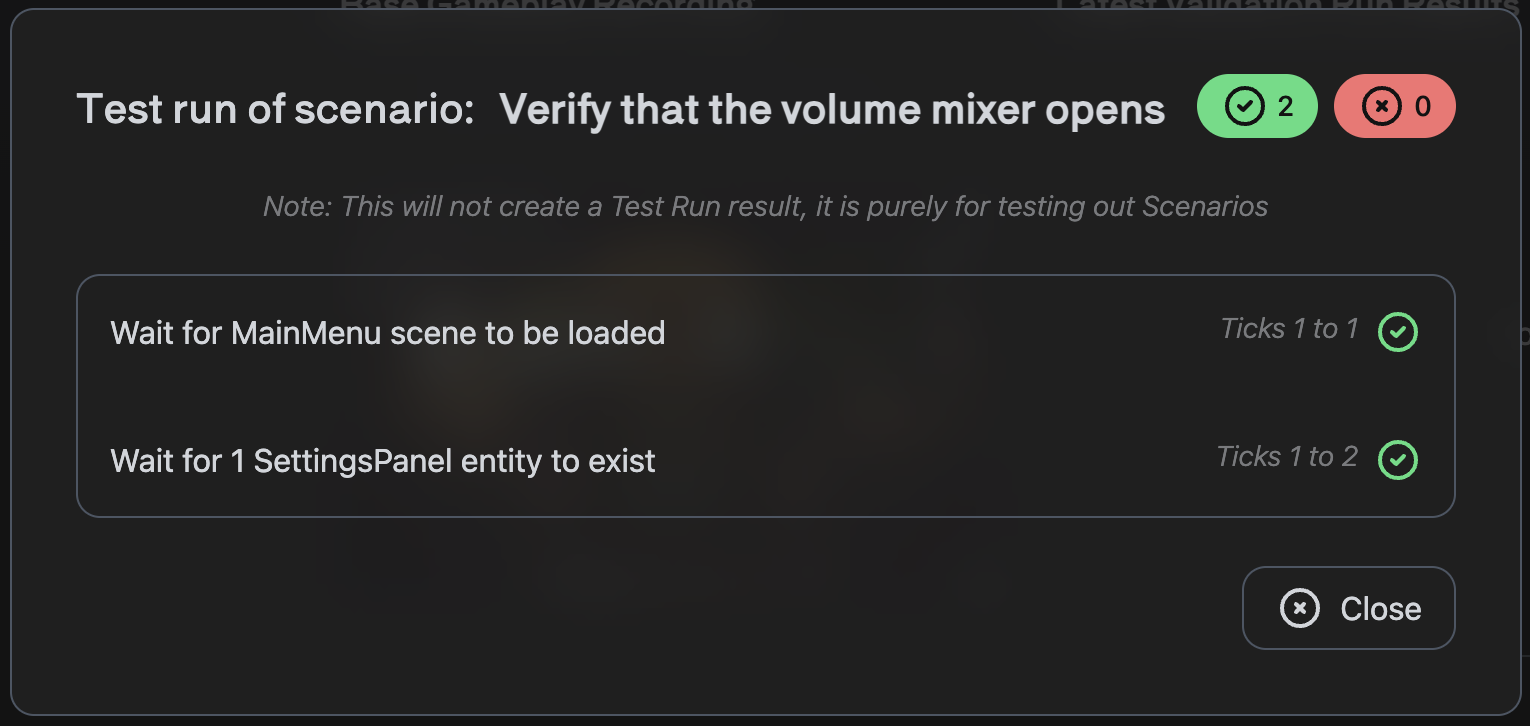
Once you are done creating these steps, click Create Scenario to save it. Back on the Validation Suite page, you can click the options menu next to the scenario you just created to run it, by selecting the Run Scenario option. This will immediately run this scenario on the original gameplay session and provide you with the results.
Run the Validation Suite on new automated runs
Now that this validation suite exists, we can run it on the other runs conducted by the automated test! In the top right of the Validation Suite, click the Run Suite button, and select a more recent gameplay session to validate. Once the test is run, you can click the result within the list of runs to see a detailed view of the passed and failed scenarios.

Next Steps
We now have a repeatable automated gameplay session that can be verified using the validation tool! If you got stuck during this tutorial, or want to brainstorm how to get the most of this tool, please join our active Discord community.. We are excited to make the best automation tools for game QA, and would love your feedback!